Single Sign-On with Azure AD
RemotePC Team and Enterprise plan users can use Single Sign-On (SSO) for accessing their account. Admin of the accounts can choose a SAML 2.0 identity provider (IdP) to login to your RemotePC account without having to remember another password.
To setup Single Sign-On (SSO) with Azure AD, the admin needs to:
- Create an app on Azure AD console
- Assign users to the app
- Configure RemotePC account for Single Sign-On (SSO)
To use Azure AD as an identity provider for SSO, you need to create an app on Azure AD console.
To create the app,
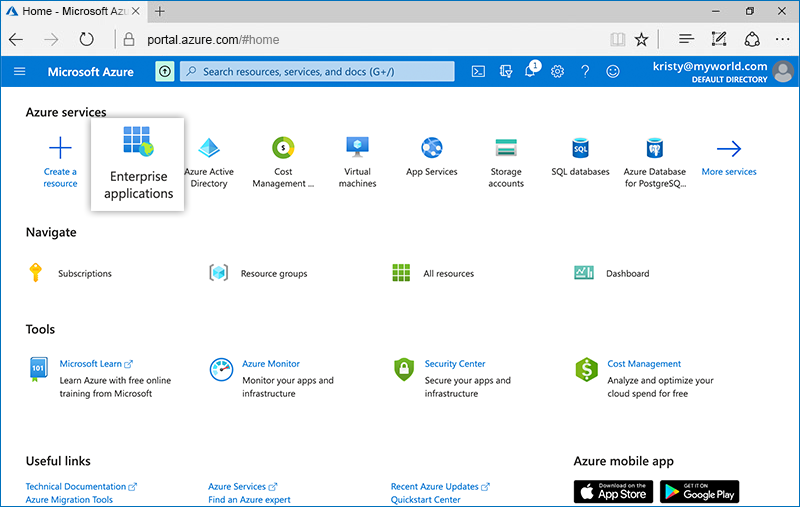
- Login to the Azure AD console using your Azure AD account credentials and click on 'Enterprise applications'.
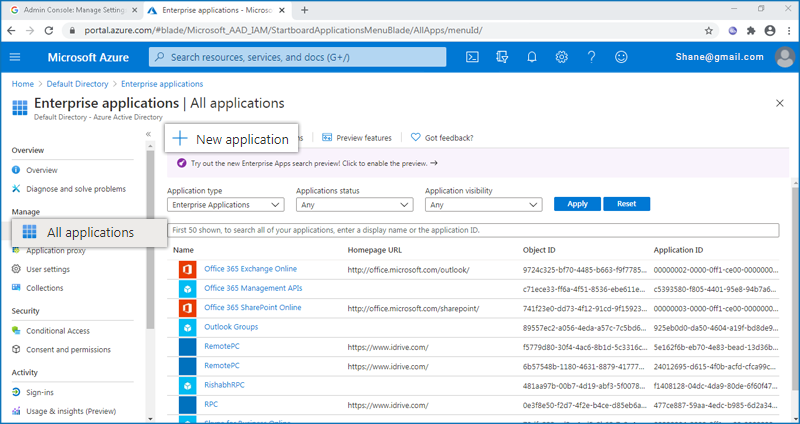
- Select 'All Applications' and click 'New application'.
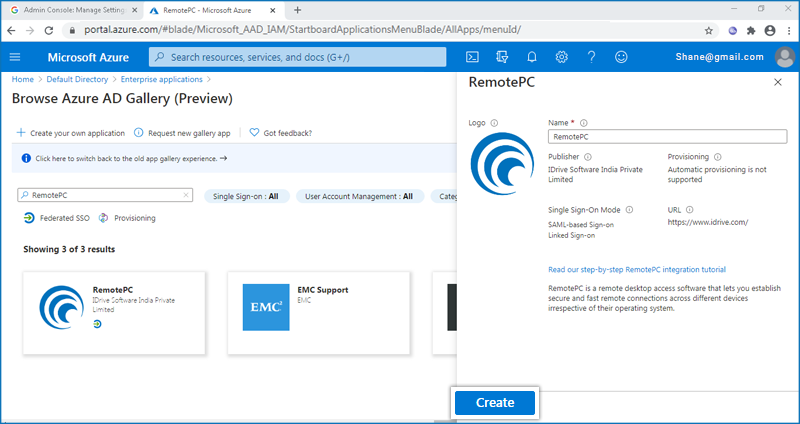
- From the app gallery that appears, search for the RemotePC application.

- Click 'Create' to add the RemotePC application to your account.
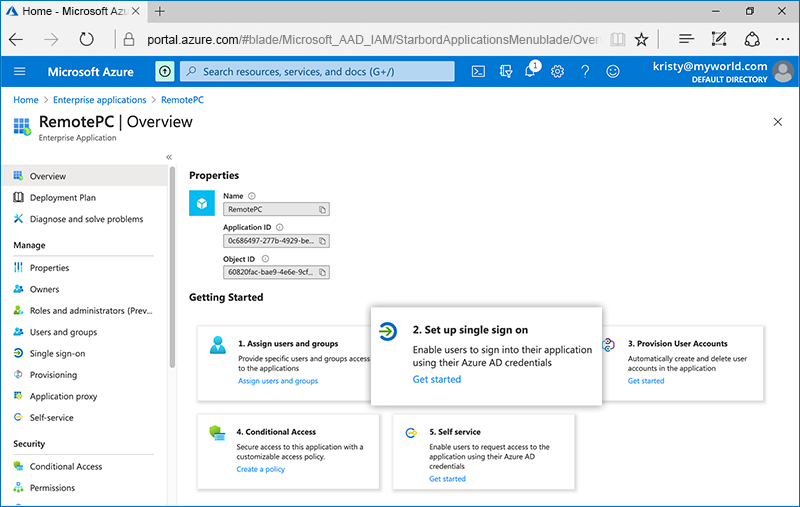
- Select 'Set up single sign on' and choose 'SAML' as the preferred single sign-on method.
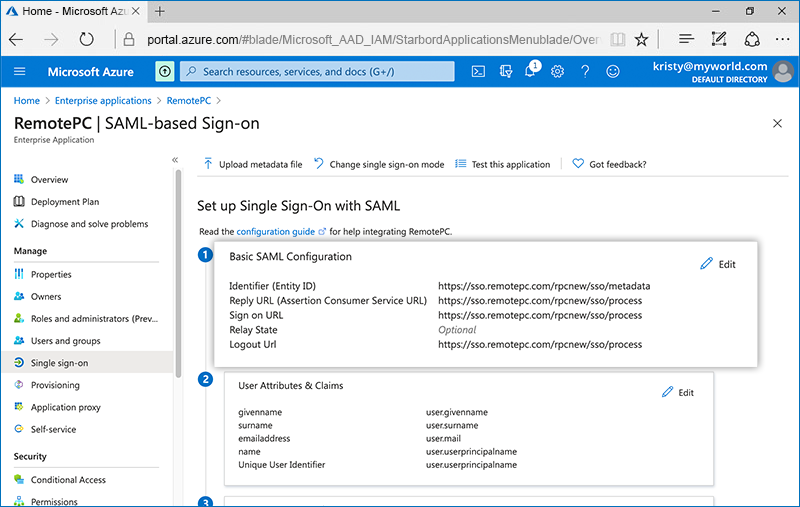
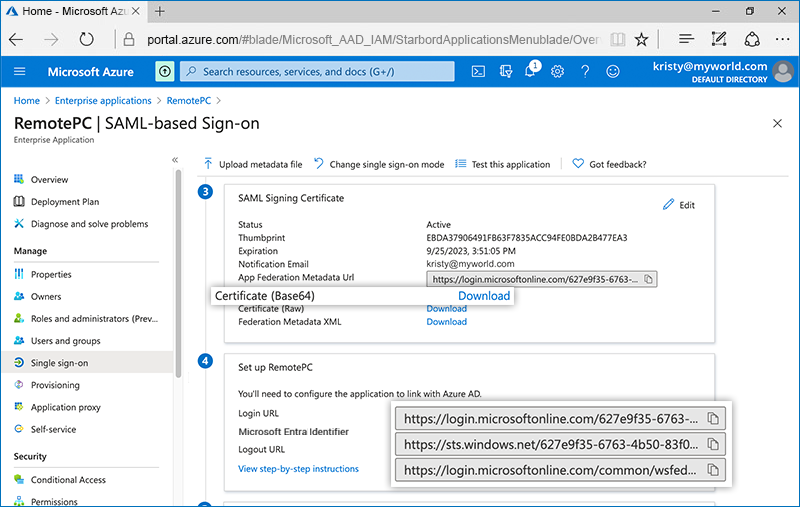
- Under the 'Setup Single Sign-On with SAML' screen that appears,
- Click 'Edit' corresponding to the 'Basic SAML Configuration' and enter the URLs as given below:
- Identifier (Entity ID): https://sso.remotepc.com/rpcnew/sso/metadata
- Reply URL (Assertion Consumer Service URL): https://sso.remotepc.com/rpcnew/sso/process
- Sign on URL: https://sso.remotepc.com/rpcnew/sso/process
- Logout URL: https://sso.remotepc.com/rpcnew/sso/process
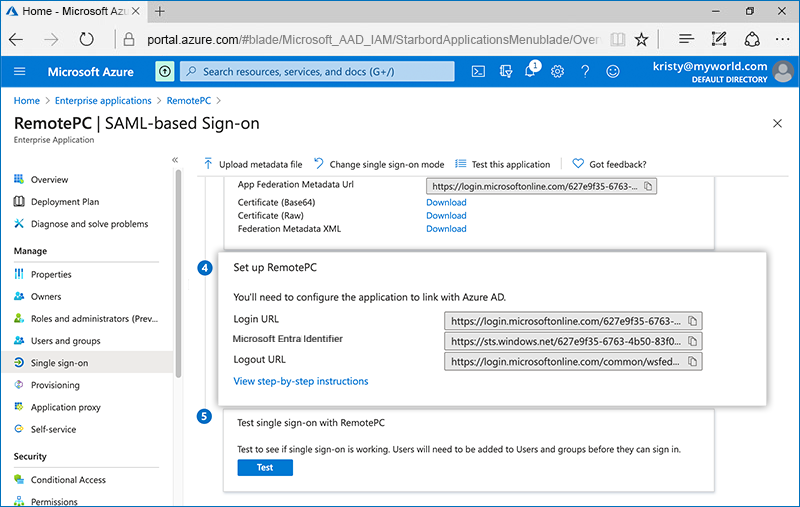
- From the 'SAML Signing Certificate' section, click 'Download' and save the x509 certificate (Base64).
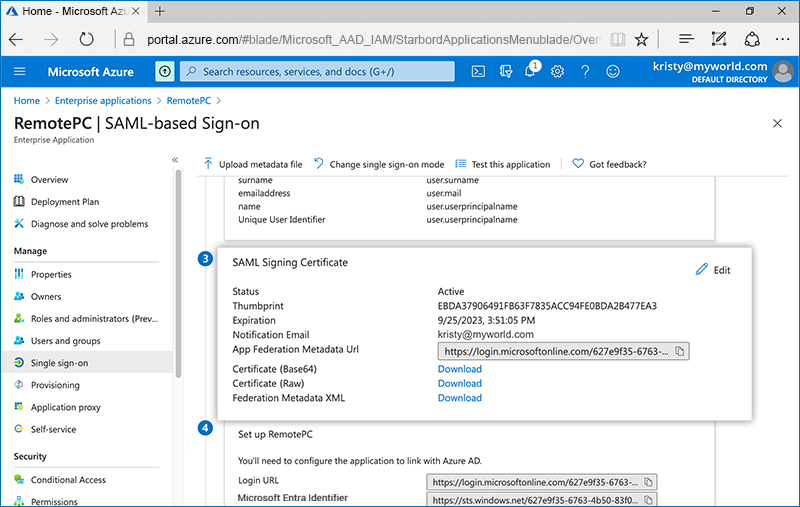
- Copy the 'Login URL' and 'Microsoft Entra Identifier' and configure it with your RemotePC account.
- Click 'Edit' corresponding to the 'Basic SAML Configuration' and enter the URLs as given below:
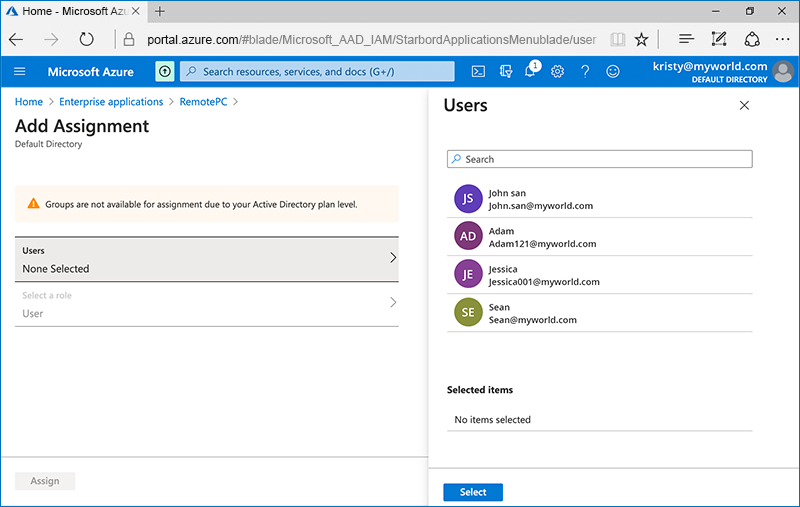
To enable SSO for user accounts, admin needs to assign users to the app created on Azure AD console.
To assign users to the Azure AD app,
- From the new app created under 'Enterprise applications' on Azure AD admin console, navigate to the 'Users and groups' tab and click 'Add user/group'.
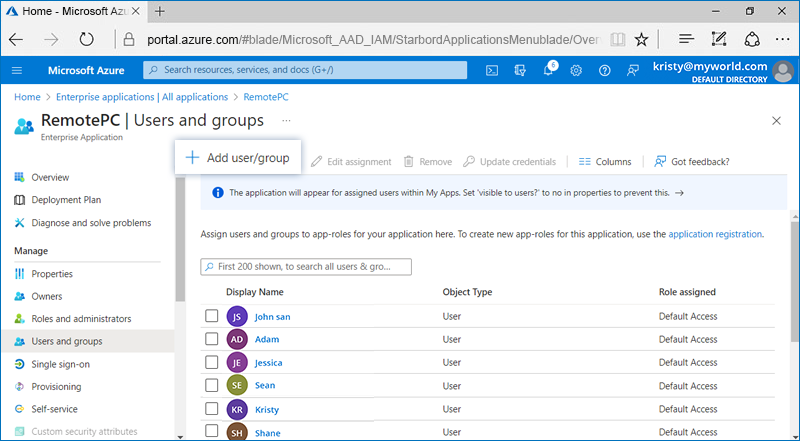
- Select the users you would like to add to the app and click 'Assign'.
Admin needs to provide the received SAML 2.0 URLs and Certificate in the Single Sign-On application from the RemotePC web interface.
To configure SSO,
- Login to RemotePC via web browser.
- Click the username displayed on the top-right corner and click 'My Account'.
- Click 'Single Sign-On'.
- Enter a name for your SSO profile.
- Enter the following URLs:
- Add 'Login URL' obtained from Azure AD console under 'Single Sign-On'
- Add 'Microsoft Entra Identifier' obtained from Azure AD console under 'IDP Issuer URL'
- Add the 'X.509 Certificate (Base 64)' received from your newly created app on Azure AD console.
- Click 'Configure Single Sign-On'.
You will receive an email when SSO is enabled for your account.